How to run sign-ups for an assessment day: sessions, seat limits and approval
You are running an assessment day: three sessions of 25 seats, candidates who should send a CV first, and a hiring team that wants to approve who comes. The usual set-up is an online form, a spreadsheet and your inbox. By the end of the week one session has 31 names, two people booked twice, the CV links are scattered over replies, and you are writing confirmation emails by hand at night.
This guide lists what a sign-up process for an exam or assessment needs to get right, whatever tool you use, and then shows how to set it up with advance registration in ExamQR.
What a good sign-up process does
- It opens and closes on time. Registration has a start and an end, so late sign-ups do not slip in after you have printed the lists.
- It checks the seat limit at the moment of booking. A form that counts afterwards will overbook. The last seat of a session must go to one person, and the session must show as full right away.
- It asks only for what you need, and says why. A CV link, the position applied for, perhaps an ID number. Every extra question costs completed sign-ups, and personal data needs a clear notice and a date when you delete it.
- You decide who sits. For open training courses, first come first served is fine. For recruitment or certification, each registration waits for your approval.
- Candidates get everything in one email. The session, the room, how to sign in on the day, and a calendar entry. A reminder the day before cuts no-shows.
- You end up with one list. Who registered, when, for which session, what they answered and whether you approved them, ready for the day and for your records.
Approval or first come, first served? Approval adds work for you but keeps control: you can check a CV before giving a seat. A pending registration still holds its seat, so a session cannot be overbooked while you decide. If you do not need to choose, switch approval off and candidates are admitted as soon as they register.
Step by step in ExamQR
Advance registration is part of the paid plans. Every plan, including Free, keeps the simple register link where candidates sign up and sit at once.
1. Turn on advance registration
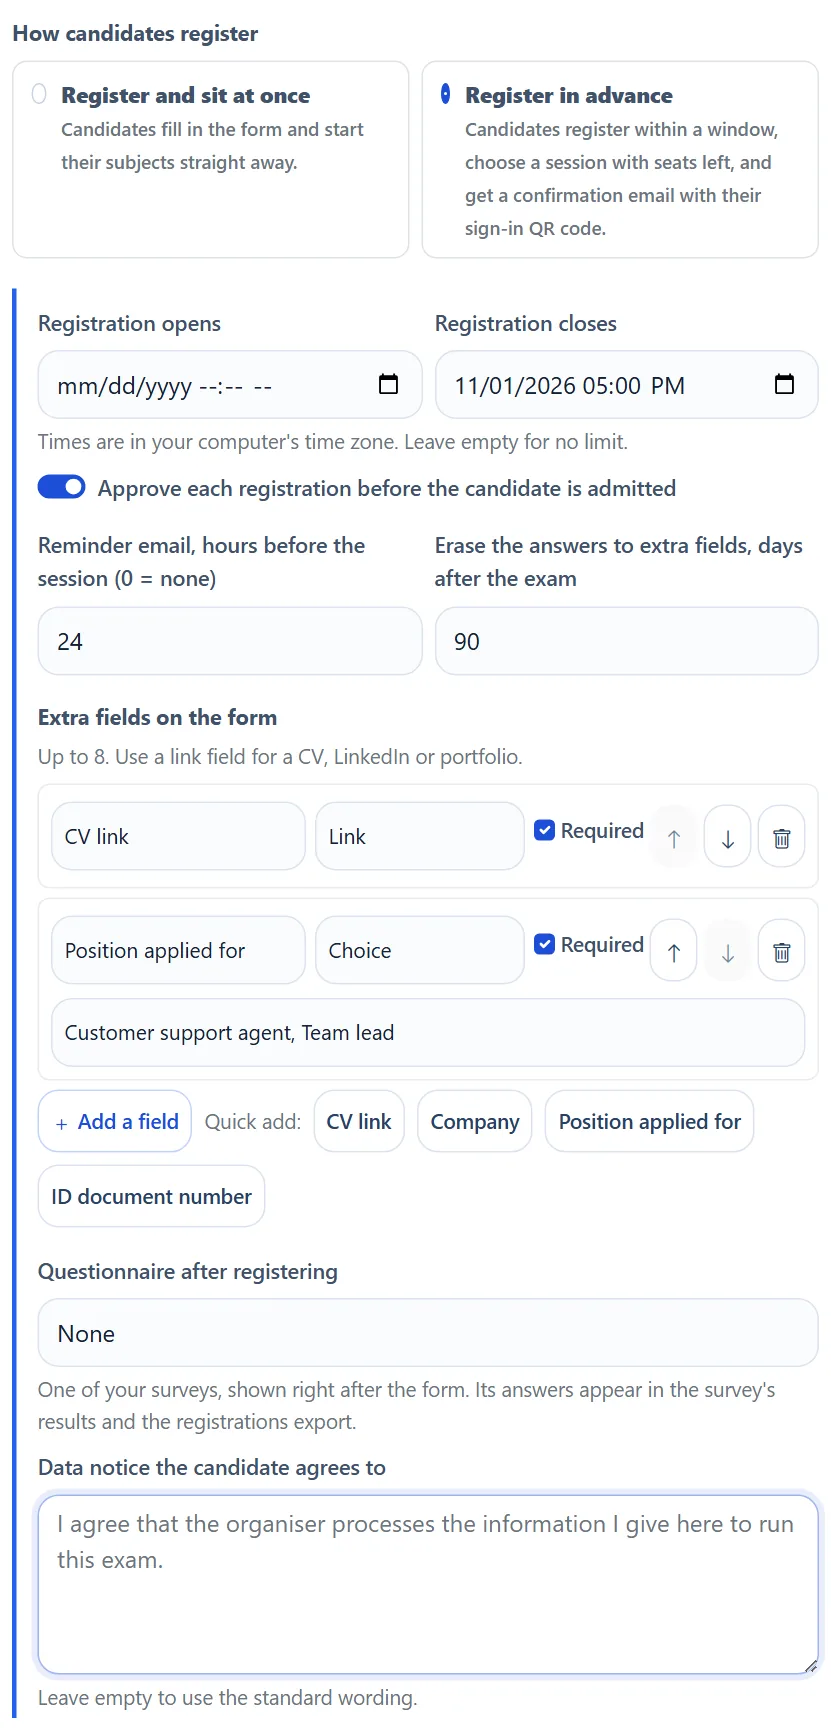
Edit the exam, allow registration and choose Register in advance. Set when registration opens and closes, and whether you approve each registration. Choose how many hours before the session the reminder goes out (24 by default, 0 for none) and, if you like, after how many days the answers to your extra questions are erased.
2. Add the questions you need
Add up to eight extra fields: short text, long text, a choice from a list, a link or a date. Quick-add buttons create the common ones in one click: a CV link, the company, the position applied for, an ID document number. Mark the ones that are required. A link field only accepts web addresses, so you do not receive a file name instead of a CV.
If you need more, attach one of your surveys: candidates answer it right after the form, and the answers appear in the registrations export. Last, write the data notice candidates agree to, or keep the standard wording.
3. Create the sessions with their seats
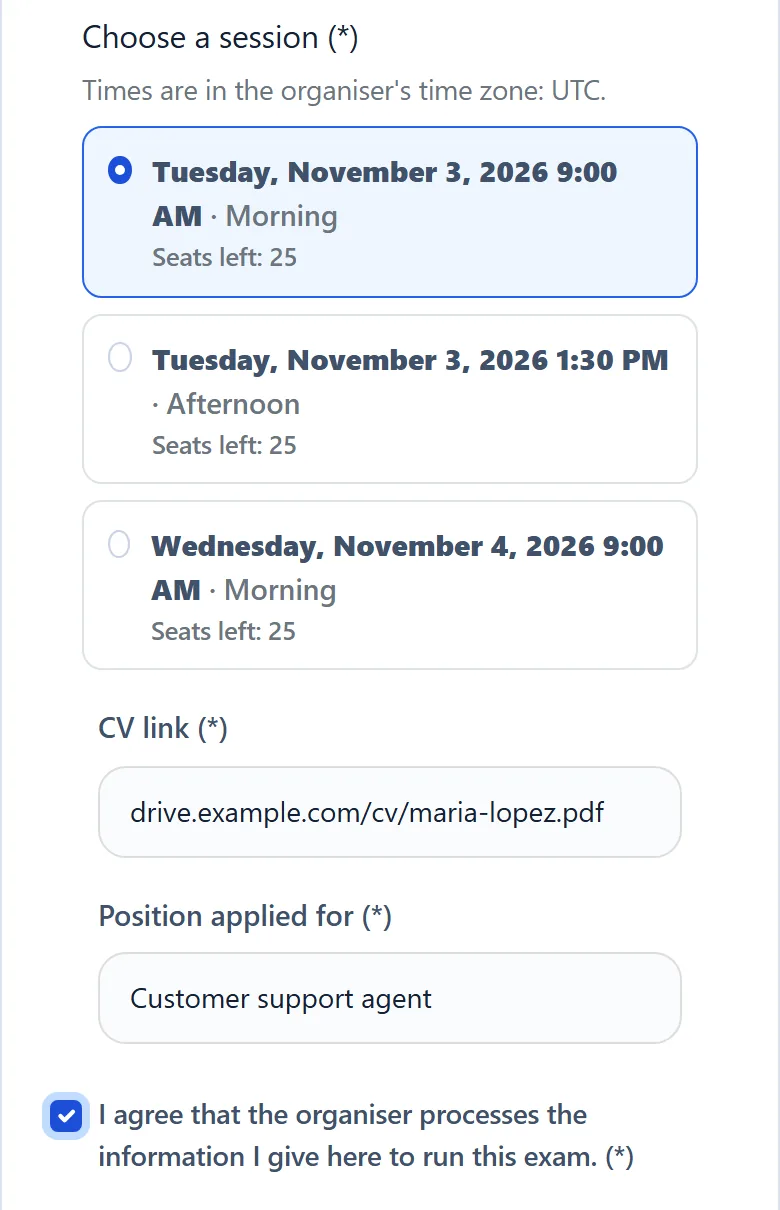
Each slot of the exam that has a subject scheduled becomes a session candidates can choose. Give every slot a seat limit. On the registration page candidates see the sessions with the seats left, in your time zone, and a full session cannot be chosen. The check happens at the moment of booking, so two people cannot take the last seat. Sessions that have already started are no longer offered.
4. Share the link and review registrations
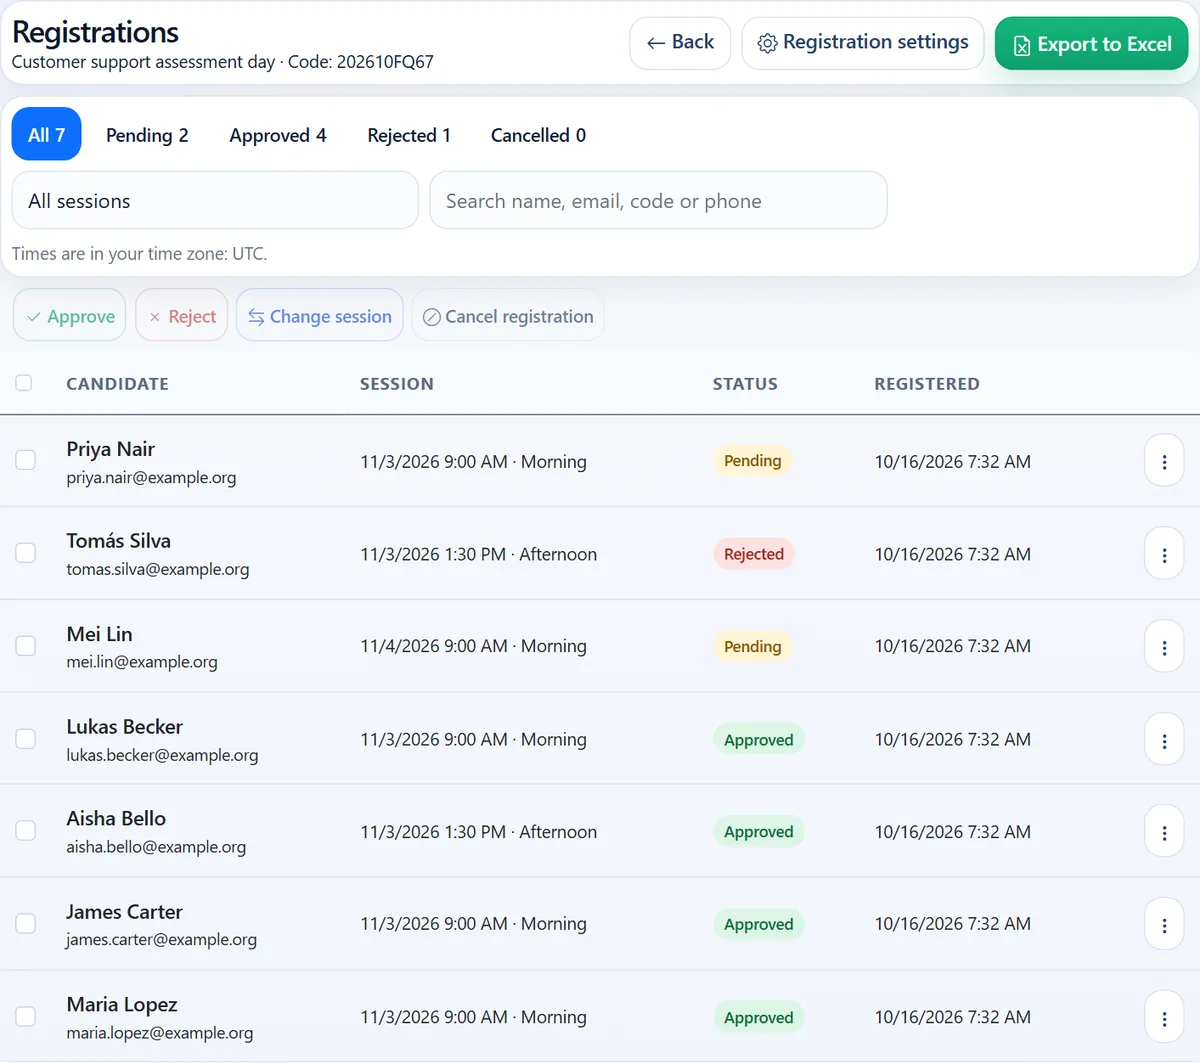
Share the register link or its QR code. Each registration then appears under Registrations on the exam page, where you can filter by status or session and search by name or email. For each candidate you can:
- approve, one by one or several at once; the candidate is admitted to the session they chose;
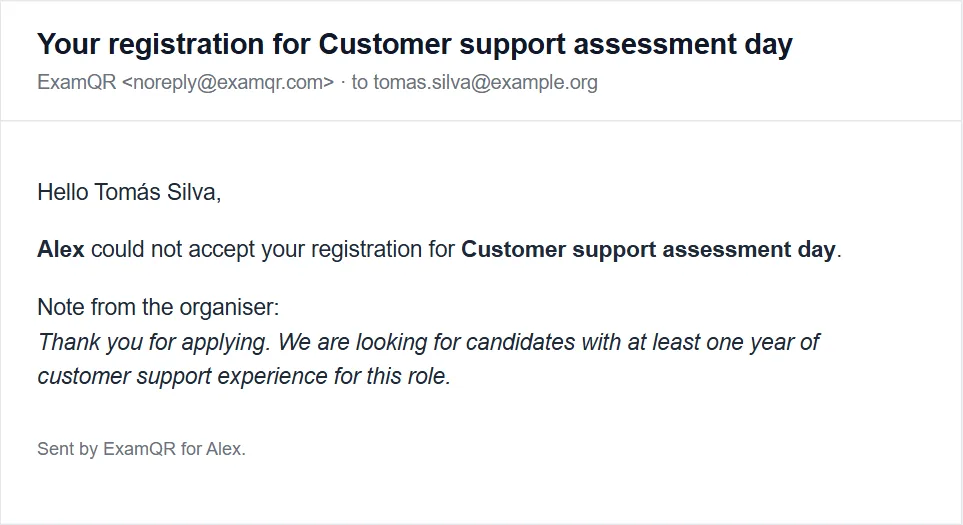
- reject, with an optional note sent in the email;
- change the session, if the new one still has a seat;
- cancel an approved registration, which removes the candidate and stops their sign-in link working. A candidate who has already started the exam cannot be cancelled, so no work is lost.
5. Let the emails do the follow-up
Candidates receive their emails in the language they registered in:
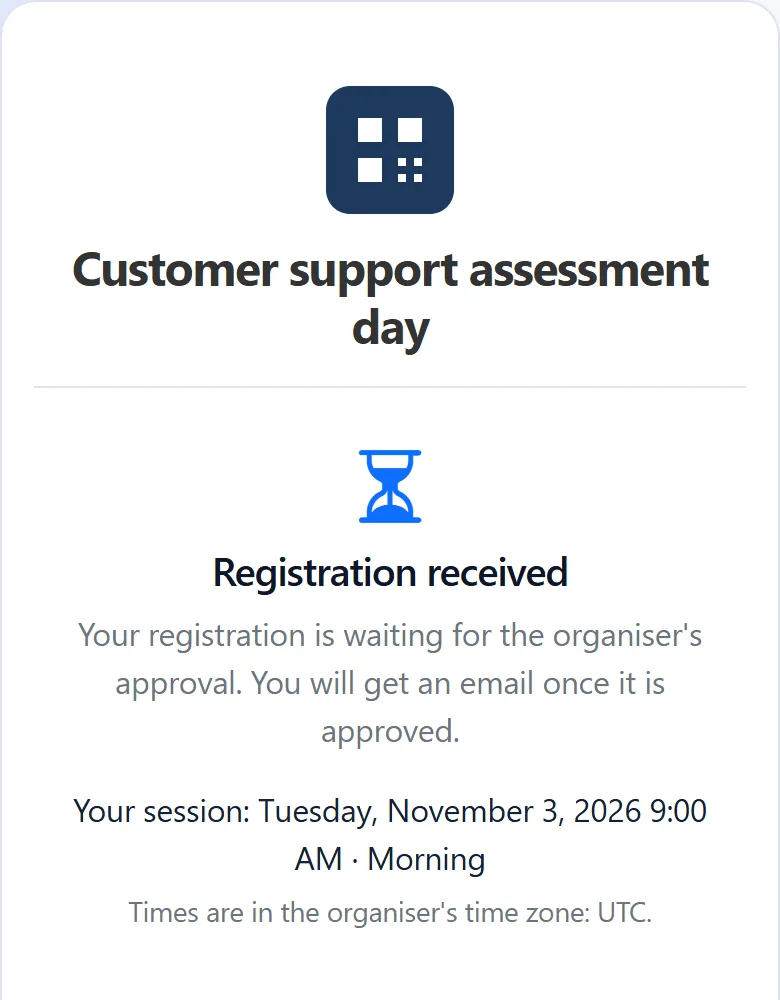
- a received email when their registration waits for approval;
- a confirmation with the session, the room, a personal sign-in QR code and link, and a calendar file for Google Calendar, Outlook or Apple Calendar;
- a rejection or cancellation with your note, if there is one;
- one reminder before the session.
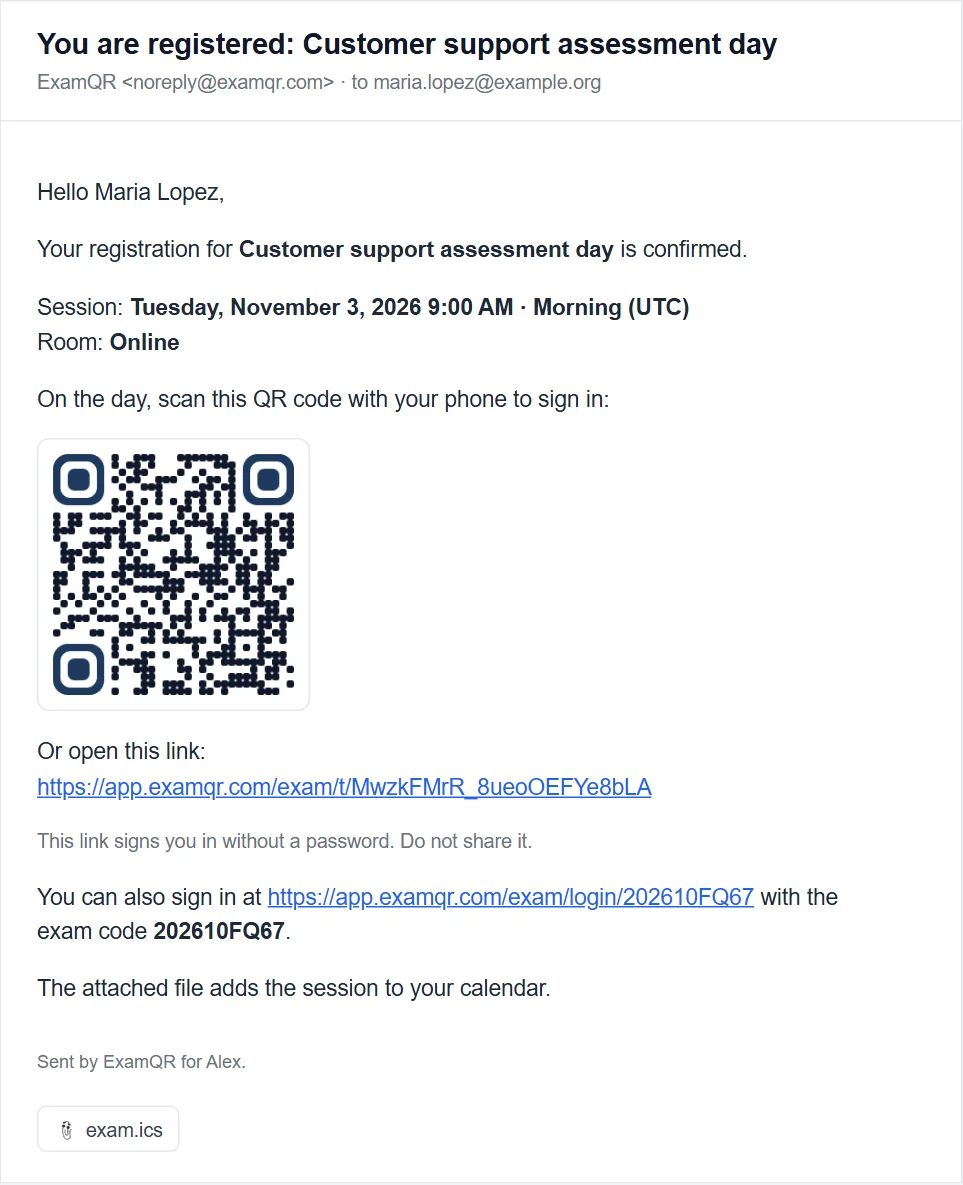
The sign-in link is personal and works without a password, so the queue at the door moves faster. If you move someone to another session, they get a new confirmation.
6. Export the list
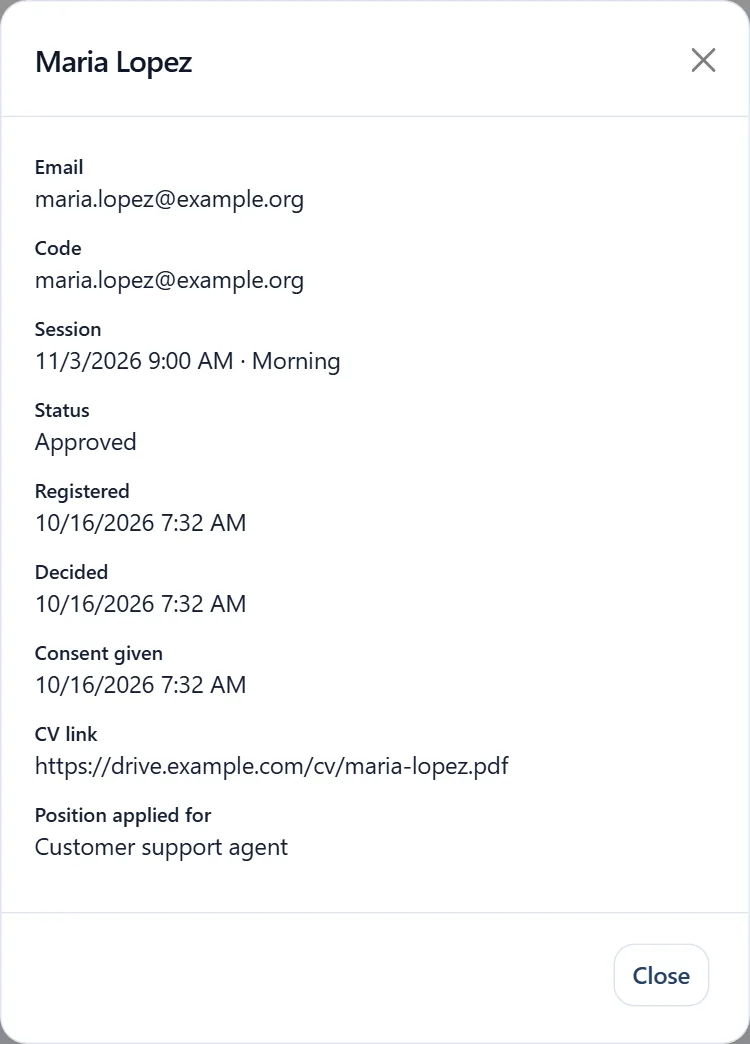
Export to Excel downloads the registrations under the current filter: the candidate's details, the session in your time zone, the status with its dates and who decided, one column per extra question (CV links stay clickable), the time they gave consent, and one column per survey question.
Common mistakes
- Collecting CVs as attachments by email. They end up in personal inboxes with no retention date. Ask for a link instead and erase the answers when the process is over.
- No closing date. Late sign-ups arrive after the lists are printed. Close registration a day or two before the first session.
- Sessions without a limit. The popular morning session fills while the afternoon one stays empty. Cap each session at the seats you really have.
- Confirming by hand. One wrong time in one email means one candidate at the wrong door. Let the confirmation come from the same data as the session.
Questions
Which plan do I need? Advance registration, with sessions, approval and emails, is on the paid plans. The register link where candidates sign up and sit at once is on every plan. See pricing.
Does a pending registration hold a seat? Yes. Pending and approved registrations both count against the session's seats; a rejected or cancelled one frees its seat.
Can candidates still sign in with a password? Yes. They sign in the way the exam is set up, with an email and password, and can also use the personal link or QR code from their confirmation.
What happens to the answers? They stay with the registration until the number of days you set has passed after the session, then they are erased; the registration itself remains.
Plan the rooms for the day with the free exam seating plan guide, and see how ExamQR runs online exams.